Other Stuff
Followers
My Book Shelf
This plugin requires Adobe Flash 9.
Monday, February 2, 2009
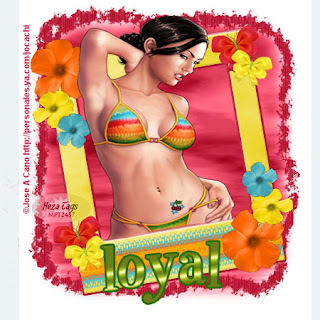
 Tropicana Tut- by Me
9:52 PM | Posted by
Hezalin |
Edit Post

Tropicana
You need a basic working knowledge of Adobe Photoshop to use this tutorial.
Any similarities to other tutorials is purely coincindental.
I used the wonderful scrapkit Lillerz Choice by The Urban Fairy. You can purchase her work here.
www.terminallyuniquedesigns.net
The Tube I used is a hot one from Jose Cano, available for purchase here.
www,mypsptubes.com.
You must have a license to use art from Jose Cano.
Let's begin.
Open new Document- 450 X 450, White backgorund.
Open mask or Choice, Invert Black and white.
Choose paper of your liking, drag onto document and free transform size to yuor choosing.
Drag onto document and fit for size .
Blending Options- Luminosity.
Choose Erasrer tool. I used a tear brush application (*by Terry Meruca, purchased at www.scrapbook-elements.com) and went around edge of mask to reveal paper undeneath.
Pick Frame of choice, drag onto document, free tranform to resize so it fits better on page and is skinnier.
Also tilt in one direction or the other. Apply Blending options- Stroke, 3 pixels, color picked with eyedropper tool from background paper.
Apply bevel and emboss style, smooth, with Shadow opacity at 9.
Open tube of Choice. Drag onto document. Resize so it fits on top of the frame, but still overhangs it.
Duplicate layer and move that layer behind the frame.
Using eraser tool with a basic round brush. Erase parts of the tube that overhang the bottom of the frame.
Choose a ribbon of your liking. Free transform size and width so that it covers most of bottom of frame.
I recoloured this one to match part of the tube.
Choose another ribbon, free tramsform size and width so that it covers middle of last ribbon.
Choose coordinating Flower. I used Hibiscus since it's a tropical theme.
Drag onto document, free transform size, placement and tilt to move it to top corner of frame.
Move behind Tube so it looks like it's part of the frame.
Choose Hibiscus flower again, recolour to coordinate with tube colors. resize smaller and place below and on top of 1st flower.
Repeat reclouring flower again and making it smaller yet and placing below 2nd flower.
Hide all layers other than 3 flowers. merge Visible.
Duplicate layer, flip horizontally and vettically. Move to bottom opposite corner or frame, tilt if need to mirron the top cluster.
Choose butterlfies of your liking. Resize quite small and add to opposite corners of frame.
Duplicate and move placement as often as you like until desired effect is achieved.
Add Copyright Info and any watermarks.
Mege Visible.
Add atext layer. I used 2 Peas Tiger tails. Apply Gradient overlay. I used NG Kiwi Fruit, reflected style, angle 99, scale 47%
Add a stroke 3 pixels of coordinating darker color to make the font pop.
Congrats! You are done your tag. Either save as a PSD/PSP file to be able to change the text, or save as a jpeg for web use!
You can find scrapkits, tags and tutorials of mine at
http://hezascraps.blogspot.com
Subscribe to:
Post Comments (Atom)


0 comments: