My Creative Team


Proud Owner

 CT Tags I made for PCD's Happy Halloween


Tag using my Reform School Girls

I made up this tag this weekend using my Reform School Girls PTU kit.
You can grab it at Treasured Scraps


Reform School Girls Sneak Peek
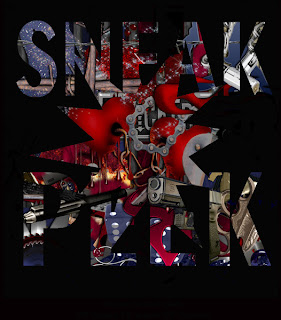
Circus of the Damned tags.

Cyrene has made an awesome kit called Circus of the Damned, that i know I had to try out! I snagged that puppy up and banged out these two tags. I think it works so great with these two tubes. You can buy this awesome kit HERE
Here's my two creations!


Asylum Tutorial

This tutorial is my own creation and any similarity to any others is soinncindental.
8/15/11
You must have a working knowledge of Photoshop to use this tutorial.
Scrap used
PSP Asylum by Alika's Scraps
Template by Sarah's Tag's and Things
No Mask used
Tube by Ted Hammond.
You need a licence to use Ted's work and it's avaialble at CDO
Filters
Mura's Meister Copies
Xero Radience
Penta Jeans
Open your template.
Delete the credit layer, Mean layer and Hearts layers.
Resize to 600 X424
Drag Element 5 (metal mesh)
Free Transform into size to suit and place in left upper corner.
Duplicate layer and rotate 180. Move to lower right corner.
Merge down.
On left Large circle layer, drag paper 1.
resize unti;l pattern suits you, and then create clipping mask.
Merge Down
Apply the default PD dropshadow.
Repeat with right large circle.
Merge the two smaller circle layers.
drag paper 12, and create clipping mask.
Merge Down
Apply default PS inner shadow.
On rectangle layer, drag paper 4.
Create clipping mask, merge down
Aply stroke in a dark gray tone,
Inside, size 3.
Take element 98 (Pill)
Drag into center of tag.
Using Mura's Meister filter's spiral settings on default.
resize to fir.
Duplaicate and rotate 180 degrees and move nto place.
Apply drop shadow to both.
On center circle, drag paper 3. Resize so pattern suits you, and
clip mask. Merge down.
Using penta filter. apply jeans settings 14 & 4.
Apply Tube offecnter to suit.
Clip mask and using Xero radience filter on these settings
Strange 128 /50/ 128/ 255
Change blending mode to lumnoosity and opacity to 75%.
Mege down.
Apply default dropshadow
Apply Outer glow, change color to white. Opacticy 75%, size 5, blend mode Screen.
Drag elements 52 & 62 ( Insane tickets) into document.
Resize to suit, and place at end of Wordart layer. Arrange to suit and applt drop shadow.
Drag element 53 ( handcuffs) in.
Resize and place on bottom corner of center circle. Dropshadow.
Element 50 ( Flaming heart) gets resized and on top of handcuffs and dropshadowed.
Apply main tube. resize and place to suit, apply dropshadow.
Move right hand pill spiral up in the layer until it shows over small circles but under tickets.
Element 91 (chains) goes on top of main tube. resize and warp transform if necessary to make it look
like it is on tube leg. Erase any bits you think are in the way. Dropshadow.
Elements 55 ( dark ligther) goes above that resized and palced to suit with dropshadow.
Apply dropshadow to wordart layer.
Font is Ghastly Panic
size 90
Gradient overlay in a dark red, normal settings.
Default dropshadow
Stroke.Outside, size 1, and black.
Apply all your copyright and watermark info and you are done!
I hope you enjoyed this tutorial!
Tag with PSP Asylum Exclsuive kit.

It's such a great kit with lots of gothy/grungy and glittery elements.
Here's the tag I created which is titled Crawl.

Tutorail with my Emo Funk

You can buy the kit at my store Treasured Scraps
You can get the tutorial HERE
CT for Jens Sweet Scraps


My go at Leopard and Red Heels


CT Results from me
Nani kahakai from Belle of the Ball.
Thasnks so much to Crystal for allowiing me to use her creations in mine!


Seaside Height- CT by Alika

Tags with Alika's Blah Blah Blah

and the tags I've created!


Tags using Rieneke's Such a Delight

and the two tags I've created.


Red Leopard CT

My Ct designer Ella created this beautiful work with my Red Leopard kit.
Thank you so much Ella!!!
New kit Red Leopard & a Freebie too!
 14 papers 1000 X 1000
60 Elements, and so much more than shown in preview! i can't shove it all in!
You can buy at in my store right now at Treasured Scraps

I've made a little freebie sampler for you all too. I hope you like it.

Which you can download HERE
I Need a Man Blog Train
Here are all the stops.
Crystal with: Crystal's Scrap Creations
Heza with: HezaScraps
Darlin with: Darlin's Creations
Jessica with: Gothic Inspirations
Shani with: Wicked Princess Scraps
My preview is here. You can download my part HERE.


This award is to acknowledge blogs that rock.
If you know a blog that rocks and want to give them this award
Then send them a message saying..."Your Blog Rocks".
Since I have accepted this award from K'Lani Designs,
I must pass it on to 5 other blogs that I think Rock.
There are no rules to this award.
Only to send it to 5 people you think deserve this award.
Make sure you leave them a message.
The 5 blogs I pick are as follows:
Doris of Scraps Dimensions
Jess of Gothic Inspirations
New Template- Born this Way
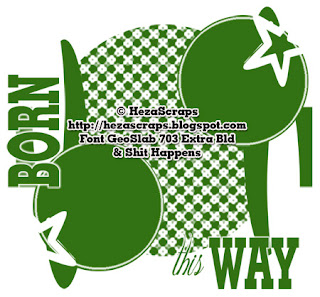 You can snag it on my 4sahared
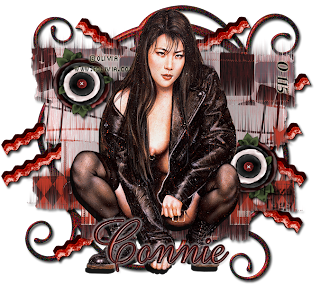
CT with Sassy by Connie's Creative Chaos


You can buy her kit here.
Sassy Mai Ling Tutorial
5/25/11
Any similarity between this and other tutorials is purely coincidental.
This tutorial was created in Photoshop CS3. You need a basic knowledge of Photoshop.
Supplies.
Scrapkit of choice I used Sassy by
Connie's Creative Chaos
Connie's Creative Chaos
Filters
Default drop shadow in photoshop
DSB Flux Blast
Font
Ambassador Script 100 pt.
Tube of Choice
I used one of Olivia's.
She now sells at Creative Design Outlet.
I got this tube at CILM though which is now closed, so not sure if this tube is available at CDO now.
This is a simple tutorial.
Let's begin.
Open a new blank document 675 W X 600 H.
Take Brass Heart Red element.
Drag into document, resize to fit and apply dropshadow (DS) in Photoshops' default settings.
Drag Ribbon Red into document. Tilt using freeform tool to suit.
Duplicate around 5 times or to suit.
Move each piece around, flip and move left or right to suit.
Unclick Heart element to make invisible.
Merge visible so ribbon layers are now 1 layer.
Aply DS.
Drag Strips Black/Red into document
Apply DSB Flux Blast filter with these settings.
DIRECTION- Upwards PERCENTAGE- 7 Click ok
I used Paper Flower 1 as an accent piece, with default ds.
Drag tube into place Resize to fit and suit.
Apply DS.
Apply the copyright info, and watermark.
If satisfied, Merge visible.
Using font of choice apply name.
I used a bevel and emboss PS setitng, settings DOWN.
Outer glow in a white color, and the default DS.
You're done!
Congrats!
New CT Tags- Fallen Angel
You can buy it at her Twilight Scraps store HERE
Thank you for letting me use this Conchi!


Taggers Anonymus Forum
I'm a mod of this forum and we're always looking for new members.
We have challenges, daily fun, chat, and various goodies. You don't have to be a tagegr or designer to join in the fun.
We've gotten a few exclusive tubes, one each form Arthur Crow and The Hunter so far, and more will be on the way.
We have a facebook group you can join as well.
The link to the forum is HERE
If you decide to join us, tell them Heza sent ya!

New PTU Kit- Emo Funk
BUY IT HERE
Funky and Punky!
21 large tagger papers
70 funky elements.
Flowers, glitter, skulls, candy and stars abound!
Papers 1000 X 1000
All elements individual png files.

Tags by me!


CT Tags for Dragon's Blood
 From Ella
I love them both, thank you so much ladies.
Cottontail Tutorial- PTU

COTTONTAIL This tutorial was written by HezaTuts on April 5, 2011.
Any similarity to any others is purely coincidental.
Template #180 by Missy. HERE
Mask by Sabine. HERE
Font Odessa LET. HERE
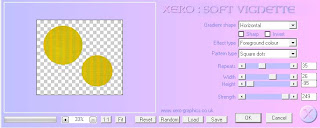
Outside filters- Xero Soft Vignette (optional)
Artwork by Elias Chatzoudis. You need to purchase it and obtain a license to use his work. PSPTUBESEMPORIUM
Scrapkit PTU by Gina's Gems- Orange ya glad it's Easter? HERE
Program. I use Photoshop CS3. I"m sure everything works in higher versions, but not in older versions.
Let's begin.
Open papers 12 & 17. Got to edit, Define pattern for each paper. You will be using these as stroke patterns later.
Open paper 19. Resize to 600 X 600. Transform into a layer.
Open mask, make sure it's resized to 600 X 600 and change to a layer from background..
Go back to paper.
In the layer palette, add a layer mask, go to channels and click the mack channel to visible.
Go back to mask. Select all. Go to edit, choose copy. Go back to paper, Go to Edit, choose paste. You'll see the mask and a red transparency. If it looks correct, unclick the layer mask visibility in the layer palette.
Go back to layers in the layers palette. Right click, apply layer mask. Duplicate 4 times. Merge visible .
Open your template document, resize to 600 X 600. Delete credit la yer and background layers. Drag your mask into document. resize if needed. I also rotated mine 180. I go from bottom to top when designing, so that is how the order is from now on.
Circle Layer - choose Paper 16, resized to 400 X 400. Drag on top of Circe, Right click on layer in layers palette and choose create a clipping mask. Merge Down. Apply Stroke, paper 17 Size 6 Outside. Scale 30 Apply inner shadow. I have settings pictured. These will be the default settings throughout the project.

Apply dropshadow. I have settings pictured. These are the default settings throughout the project.

Thin rectangle 1= Paper 15, resize to 550. Drag, create clip mask and merge. Stroke- I chose a green from the paper, inside, size 5. Apply drop shadow and inner shadow.
Thin rectangle 2 layer = Green Add ON paper 5. Resize to 550, Drag, clip and merge. Repeat with thin rectangle layer 3. Merge both thin rectangle layers. Apply drop & inner shadow. Stroke, pattern, Paper 12 Inside, scale 45.
Circle background layer = Paper 22. Resize to 600, drag, clip and merge. Ensure foreground color is same green from the earlier paper.
Apply Xero Soft Vignette filter, following the setitngs pictured. This step is optional because much is covered, so it's a matter of personal preference to use it or not.
Circle Frame 1= paper 17 Pattern. Go to Layers, add layer style, Pattern overlay. Settings pictured for scale.
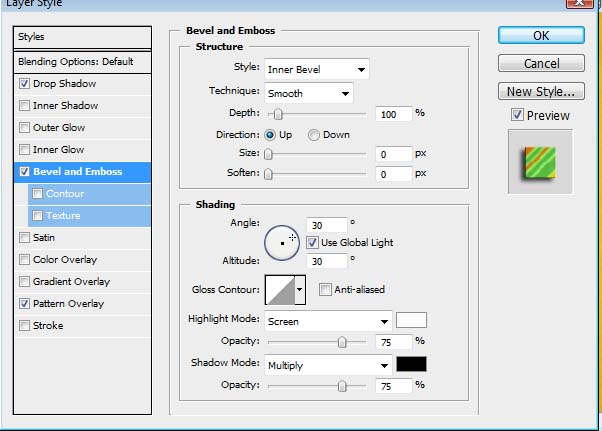
Go to layers, convert to smart object. Go to edit, transform, rotate 180. Apply Drop shadow & bevel. Settings pictured.
Circle Frame 2. Repeat Frame 1 procedure, but no need to convert to smart object and rotate. Apply drop shadow & bevel.
TUBE PLACEMENT.
Select closeup and drag into document, move to just above the circle background layer. Use eraser tool to erase any part of tube that shows through circle frame #2. Clip mask tube. Duplicate la yer. On bottom layer of tube, set blending options to Luminosity, on top layer of tube set blend to Soft Light. Merge bottom layer with circle background, then merge top layer with circle background.
Select mid size layer of tube, drag into document. Repeat of all top steps but inside circle frame #2, make sure to erase any part fo tube that show through circle fame #1.
Choose full size tube, slide onto back circle layer,flip horizontally and repeat all of above steps. Slide full size tube into document and resize if needed and place on right side of tag. Apply drop shadow.
ELEMENTS
Botanical Flower 1- drag into document, free transform size and place in middle of circle frames. Add DS "dropshadow"
Brown egg & Ribbon 2- Flip horizontal, resize as needed, and place below circle frame. Add DS Flower Spray 1, place under Egg and resize to suit. Add DS. Duplicate and rotate 180,and place in upper right hand corner below main tube.
Flower Bunch- add, resize and place under egg too. Add DS. You might need to adjust the distance on this since it's a thin piece, so the DS isn't too far away.
Curled Ribbon 3- resize to 550, add and place under flower bunch, flip horizontally. Add DS,and adjust if needed.
Duckling- add and resize and place as desired. Add DS.
Add copyright info, license and and watermarks and MERGE VISIBLE.
TEXT ODESSA LET 72. Same green as previously used. Apply Stroke- White- Outside- Size 2. Apply DSApply Bevel with pictured settings.

Save as a PMG-24 file.
You are finished!
Thank you for completing my tutorial!